Molecule Replacement Using QMzyme
Objective
The objective of this tutorial is to replace a currently present ligand/residue in a protein system with a substrate/mutation of choice.
This workflow allows you to:
Align the heavy atoms of the desired molecule with the heavy atoms of the reference molecule
Replace the current molecule/residue with the desired molecule/residue
It is recommended to first visit the QM-only calculation workflow due to the similarity in the workflow. You can find it here.
In this specific example, we are using ketosteroid isomerase (KSI) as the model system. The structure for KSI is obtained from the PDB 1OH0 and MM-minimized prior to this tutorial. In this PDB, KSI is bound to equilenin (EQU), which is an analogue of the dienolate reaction intermediate. Quite often, it is seen that resolved crystal structures contain non-reactive analogues; however, most QM studies aim to study the reaction path. Hence, it is necessary to replace the non-reactive analogue with the reactive substrate. In the case of KSI, we’ll be replacing it with product analogue, 19NT. Since EQU is a reaction analogue, it can be assumed that these molecules will have similar binding poses. Hence, rather than going through a docking procedure, we only need a substrate molecule (which we made by modifying EQU), and then use QMzyme to align it to and replace EQU, thus providing us with the starting structure for the reactive species.
Classes used in this example
Required Files
To start, you will need:
A fully prepped and protonated PDB of the reference protein file with the ligand bound (if applicable).
A structure of the desired substrate (preferably generated from the currently bound ligand)/mutation (preferably in .PDB or .mol2 format).
[13]:
# Here are the necesary imports for this tutorial!

import QMzyme
from QMzyme import GenerateModel
from QMzyme.SelectionSchemes import DistanceCutoff
from QMzyme.data import PDB, LIG
from QMzyme.RegionBuilder import RegionBuilder
import MDAnalysis
Initialize Model and Define Regions
First, we need to generate a model for the full protein–ligand complex using GenerateModel(). We update the charge of EQU with residue_charges.update(), where we can manually update the charge of an unknown residue. Afterwards, set_catalytic_center() is used to designate a catalytic center in QMzymeModel. At last, we will utilize DistanceCutoff() class to get a region containing ligand that needs to be replaced.
[14]:
# We first initilize QMzymeModel by loading structure file.
# The initial pdb file should be prepared prior (hydrogens must be present).
model = QMzyme.GenerateModel(PDB)

# This adds unknown residue charge.
QMzyme.data.residue_charges.update({'EQU': -1}) # EQU ligand

# We set our catalytic center and our region of interest using DistanceCutoff SelectionScheme.
model.set_catalytic_center(selection='resname EQU and segid A')
model.set_region(selection='resname EQU and segid A', name='old_ligand')
model.set_region(selection=DistanceCutoff, cutoff=5)
Charge information not present. QMzyme will try to guess region charges based on residue names consistent with AMBER naming conventions (i.e., aspartate: ASP --> Charge: -1, aspartic acid: ASH --> Charge: 0.). See QMzyme.data.residue_charges for the full set.
Acquire Replacement Region
Here, we initialize the substrate model and create the region that corresponds to the atoms you want to include in the final model. This is done first by loading the replacement structure file as MDAnalysis universe and saving it as QMzymeRegion, which can be used in next step for alignment and replacement.
Note: In this case, we are using the whole substrate PDB to create the region containing all the atoms that are to be substituted. However, in case there is a full protein structure, the region can be made by selecting the corresponding atoms, and the protocol remains the same.
[15]:
# We import the ligand region and update charge.
region_19nt = model.import_region(LIG, name='19nt')
QMzyme.data.residue_charges.update({'6VW': 0})

# Update the resid of the replacement region to the removed region.
original_resid = model.old_ligand.atoms[0].resid
region_19nt.atom_group.residues.resids = original_resid
for atom in region_19nt.atoms:
    atom.resid = original_resid
Aligning the Substrate to the Bound Ligand
The align_to() method is present in the QMzymeRegion class. It can be used to align specific atoms and then update the aligned atoms to the region.The alignment procedure also reports RMSD values before and after alignment.
⚠ Important considerations:
Align the substrate (self) to the full protein–ligand complex (other).
Do not align the other way around.
This can be ensured by specifying the substrate model before the “align_to” function. This will assign the substrate model to “self”.
This ensures:
The substrate region is updated to match the aligned coordinates.
The substrate moves into the position of the bound ligand.
The ligand does not move to the substrate coordinates.
Two critical arguments self_selection= and other_selection= specify the atoms used for alignment. Make sure that the number of atoms in the reference (self) and in the target (other) are the same. If the number of atoms in the selections differs, then the alignment will fail.
If your substrate PDB was generated independently (not modified directly from the bound ligand), ensure that corresponding heavy atoms are properly labeled. This will ensure that the correct atoms are getting aligned.
[16]:
# Align the new ligand to our old ligand.
region_19nt.align_to(other=model.old_ligand,
    self_selection="element C", other_selection="element C")
RMSD before alignment: 106.6041030883789 Å
RMSD after alignment: 0.26720352674071335 Å
Replace the Currently Bound Ligand with the Aligned Substrate
To replace the current ligand with our desired ligand, we have to create a region containing both our original DistanceCutoff region containing current ligand and our replacement region with combine(). Afterwards, we can remove our current ligand using subtract(), a method that removes the selected region from the combined region. Afterards, we will save the new region in our model_ksi using set_region() to include it to QMzymeModel for input file generation.
[17]:
# Combine new ligand and protein in new QMzymeRegion.
new_region = model.get_region("cutoff_5")

# Remove old ligand.
new_region = new_region.subtract(model.old_ligand)

# Add new ligand.
new_region = new_region.combine(region_19nt)

# Add new region to ksi_model.
model.set_region(selection=new_region, name="ksi_19nt_cutoff5")

This panel displays the original crystal active site structure. The non-reactive ligand remains bound inside our QM region, surrounded by the native amino acid environment captured during crystallography.
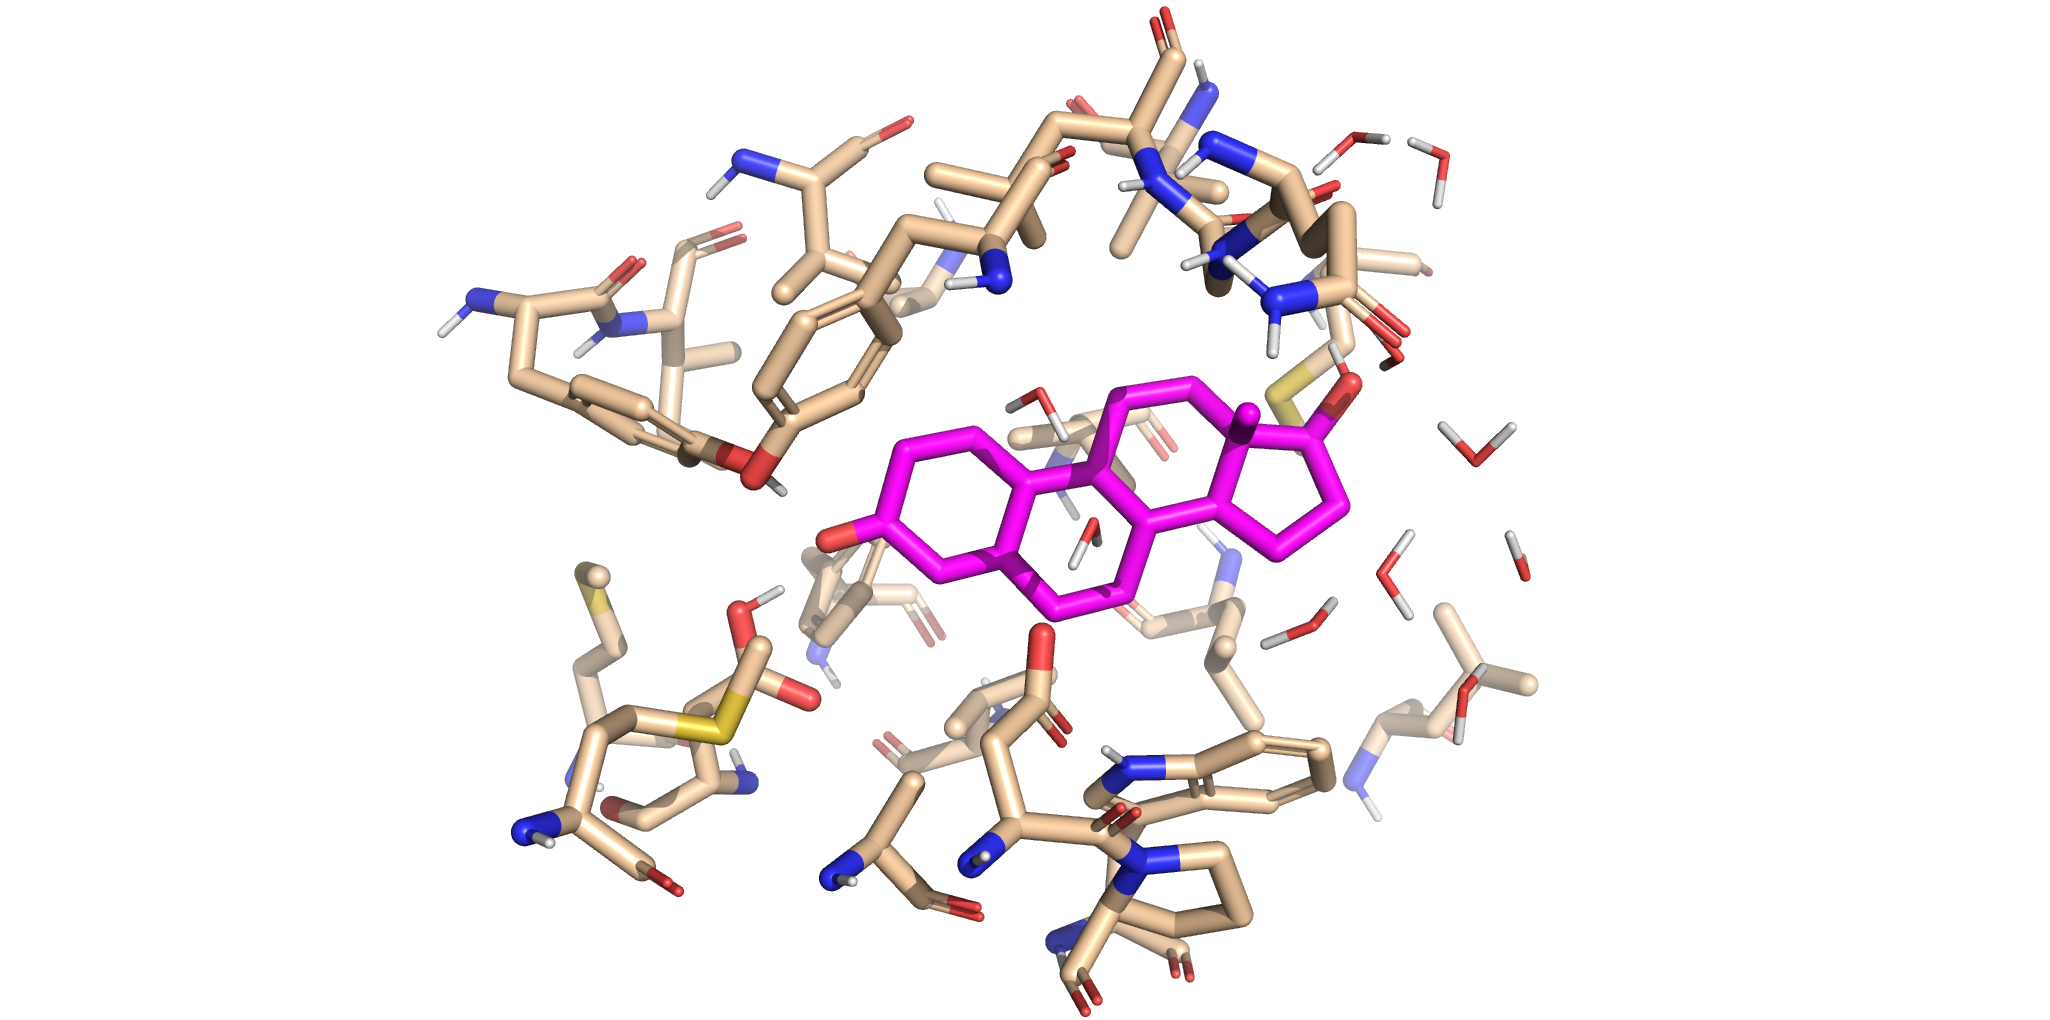
This panel reveals the newly updated reactive complex. The old ligand has been replaced with the aligned product analogue. Notice how the new ligand is in similar location as our original ligand, suggesting that the ligand replacement has been successful!
Write QM Input File
Now that we have created our region of interest with new, replaced ligand, we can continue with rest of our QM workflow, where we will:
Fix alpha carbons
Define the QM method
Assign it to the newly created region
Truncate the model
Write the desired QM input file
Note: For more details regarding the protocols used in this step, please refer to QM-only Calculation.
[ ]:
# Selecting and freeznig CA atoms.
ca_atoms = model.ksi_19nt_cutoff5.get_atoms(attribute="name", value="CA")
model.ksi_19nt_cutoff5.set_fixed_atoms(atoms=ca_atoms)

# We first create two QM method, each with desired level of theory.
qm_method = QMzyme.QM_Method(
    basis_set='6-31G*',
    functional='wB97X-D3',
    qm_input='OPT FREQ',
    program='gaussian'
)

# Afterwards, we assign two methods to their own respective region.
qm_method.assign_to_region(region=model.ksi_19nt_cutoff5)

# We truncate the model with TerminalAlphaCarbon class.
model.truncate()

# Finally, we create input file for QM calculation.
model.write_input()
References Cited
The PyMOL Molecular Graphics System, Version 3.0 Schrödinger, LLC.